Copy to Clipboard with Stimulus & Rails

In this post, we'll learn how to implement a Copy to Clipboard feature using Stimulus within a Rails application. Before diving into the specifics, let's take a moment to understand what Stimulus is.
Stimulus is a JavaScript library that facilitates adding small, targeted enhancements to web applications. It's part of the Hotwire stack, which is an innovative approach to building modern web apps without the complexity typically associated with heavy JavaScript frameworks for building single page apps. While Stimulus can be used as a standalone library, this post will show how it fits into a Rails application, where it enhances server-rendered HTML with just the right amount of interactivity, aka "JavaScript sprinkles".
Here's what we'll build - given some text and a button:
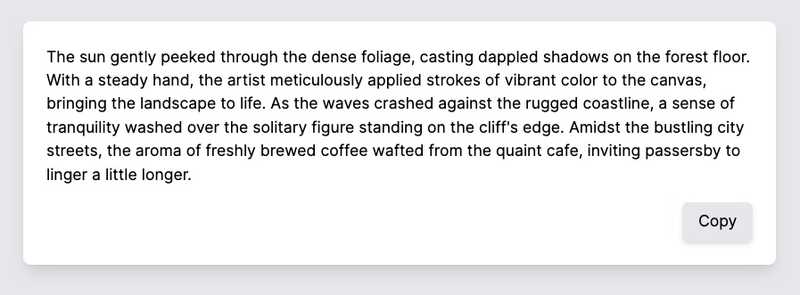
When the Copy button is clicked, the text is copied to the clipboard, and the button text updates to indicate it has been copied:
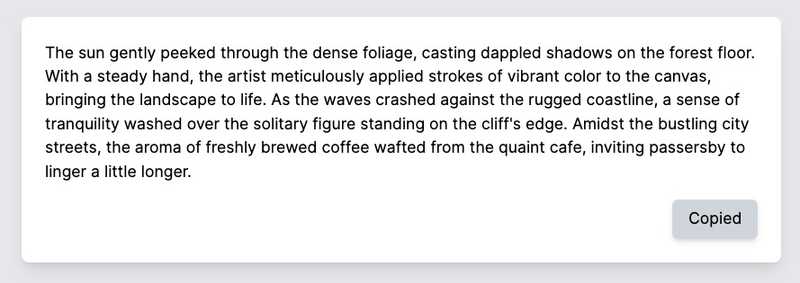
At this point, the text starting with "The sun gently peeked.." can be pasted anywhere. A few seconds later, the button text updates to its original value:

The completed project is on Github.
The copy button is an example of a feature that doesn't need server interaction. There's no need to send a request to the server, maintain state in the database and update the url of the application. This is why JavaScript with Stimulus is a perfect solution for this. Let's get started.
This post assumes a basic understanding of Rails controllers and views, and JavaScript, including events and DOM manipulation.
Initial Setup
For this project, I'm using Rails 7.1 and generated a controller that makes some data available for a view as follows:
bin/rails g controller welcome index# app/controllers/welcome_controller.rb
class WelcomeController < ApplicationController
def index
@very_important_content = <<-CONTENT
The sun gently peeked through the dense foliage, casting dappled shadows on the forest floor.
With a steady hand, the artist meticulously applied strokes of vibrant color to the canvas, bringing the landscape to life.
As the waves crashed against the rugged coastline, a sense of tranquility washed over the solitary figure standing on the cliff's edge.
Amidst the bustling city streets, the aroma of freshly brewed coffee wafted from the quaint cafe, inviting passersby to linger a little longer.
CONTENT
end
endHere is the corresponding view that displays this content:
<%# app/views/welcome/index.html.erb %>
<div>
  <%= @very_important_content %>
</div>
Let's make it the default route:
# config/routes.rb
Rails.application.routes.draw do
  get "welcome/index"
  root "welcome#index"
end
Now we'd like to add a Copy button that copies the content text to the clipboard. To get started with the copy to clipboard feature, we first need a button that the user can click to start the interaction. Normally buttons would be contained in a form with an action that POSTs to the server. But this is going to be a client-side only interaction, therefore no form or action is needed:
<%# app/views/welcome/index.html.erb %>

<div>
  <%= @very_important_content %>
</div>

<%# === ADD BUTTON HERE === %>
<button>Copy</button>
Introduce Stimulus
The next step is to generate a Stimulus controller. This is a JavaScript file that will be responsible for:
- Handling the Copy button click event
- Using the Clipboard API to copy the text in the content div to the clipboard
- Updating the text of the Copy button to "Copied" for 2 seconds, and then setting it back to "Copy" after the 2 seconds have passed.
Rails provides a generator for this:
bin/rails generate stimulus clipboard
# create  app/javascript/controllers/clipboard_controller.js
This creates the following file:
// app/javascript/controllers/clipboard_controller.js
import { Controller } from "@hotwired/stimulus"

// Connects to data-controller="clipboard"
export default class extends Controller {
  connect() {
  }
}
The connect() function is one of several lifecycle callbacks. It's called every time the associated element enters the DOM. To associate a DOM element with a Stimulus controller, data- attributes are used. This will make more sense with an example.
Let's update the welcome view to wrap both the content and button in a wrapper div, and assign the data-controller attribute to the wrapper div to connect it to our controller:
<%# app/views/welcome/index.html.erb %>

<%# === CONNECT CLIPBOARD STIMULUS CONTROLLER TO DOM === %>
<div data-controller="clipboard">
  <div>
    <%= @very_important_content %>
  </div>
  <button>Copy</button>
</div>
Now update the connect() function in the controller to log that it's been called:
// app/javascript/controllers/clipboard_controller.js
import { Controller } from "@hotwired/stimulus"

// Connects to data-controller="clipboard"
export default class extends Controller {
  connect() {
    console.log("=== CLIPBOARD CONTROLLER CONNECTED === ")
  }
}
Navigating to http://localhost:3000/ with the browser dev tools open to the Console tab should show:
=== CLIPBOARD CONTROLLER CONNECTED ===Recall welcome/index is the default route. So when navigating to /, the welcome controller index action renders the app/views/welcome/index.html.erb view, which causes the div with data-controller="clipboard" attribute to enter the DOM, which in turn causes the connect() function in the clipboard Stimulus controller to run.
Copy Button Action
Now that the controller is connected, it's time to make it do some actual work.
Stimulus uses actions for handling DOM events. An action connects a DOM element and an event listener fired on that element, to a function within the controller. In this case, we need to handle the "click" event on the Copy button.
Update the markup by adding a data-action attribute on the button element:
<%# app/views/welcome/index.html.erb %>
<div data-controller="clipboard">
  <div>
    <%= @very_important_content %>
  </div>

  <%# === CONNECT CLICK EVENT ON BUTTON TO COPY FUNCTION IN CONTROLLER === %>
  <button data-action="click->clipboard#copy">Copy</button>
</div>
The syntax for the data-action value is "event->controllerName#controllerFunction".
Then add a copy() function in the controller. For now, it just logs that it was called. The connect() function has been removed as we don't need to run any code when the element enters the DOM.
// app/javascript/controllers/clipboard_controller.js
import { Controller } from "@hotwired/stimulus"

export default class extends Controller {
  // Executed when a DOM element with `data-action="click->clipboard#copy"`
  // is clicked on.
  copy() {
    console.log("=== CLIPBOARD COPY CALLED ===")
  }
}
Now if you refresh http://localhost:3000 and click the Copy button, the dev tools Console tab should show:
=== CLIPBOARD COPY CALLED ===Since the click event is commonly used for button elements, Stimulus provides a shorthand syntax for the data-action attribute, allowing you to leave off the "click" event:
<button data-action="clipboard#copy">Copy</button>The full list of shorthands can be found here.
Now that the click event handler is hooked up to the Stimulus clipboard controller, the next step is to update the copy() function to use the Clipboard API to copy the text in the content div. The structure will be as follows:
// app/javascript/controllers/clipboard_controller.js
import { Controller } from "@hotwired/stimulus"

export default class extends Controller {
  copy() {
    // The text to be copied should come from the content div
    const text = "TBD..."

    navigator.clipboard.writeText(text)
      .then(() => {
        // success
      })
      .catch((error) => {
        // fail
      });
  }
}The controller needs to know what text to copy. The actual text is contained in the content div. This requires getting a reference to the DOM element <div>The sun gently peeked through...</div>. This is explained in the next section.
Targets
Stimulus uses targets to get references to specific DOM elements that are within the scope of the controller. This is accomplished by adding a data-clipboard-target=XXX attribute to an element, where XXX will become part of the variable name in the controller. The clipboard part of this data attribute refers to the controller name.
For the copy to clipboard functionality, we need a reference to the content div so that we can extract its innerText to pass to the clipboard. We'll name this content by adding a data-clipboard-target="content" to the content div:
<%# app/views/welcome/index.html.erb %>

<div data-controller="clipboard">

  <%# === MAKE THIS ELEMENT AVAILABLE IN CONTROLLER === %>
  <div data-clipboard-target="content">
    <%= @very_important_content %>
  </div>

  <button data-action="clipboard#copy">Copy</button>
</div>
To get a reference to the content element in the Stimulus controller, add it to the static targets array. Then it can be used in any function as this.contentTarget. The code below logs out the innerText value of the content div:
// app/javascript/controllers/clipboard_controller.js
import { Controller } from "@hotwired/stimulus"

export default class extends Controller {
  // ADD DOM ELEMENT TARGETS HERE
  static targets = ["content"]

  copy() {
    // Now we can reference `this.contentTarget` to get the
    // DOM element having data-clipboard-target="content"
    const text = this.contentTarget.innerText
    console.log(`=== TEXT TO BE COPIED: ${text} ===`)
  }
}
Now if you refresh the browser at http://localhost:3000 and click the Copy button, the console tab should display:
=== TEXT TO BE COPIED: The sun gently peeked through the dense foliage... ===Clipboard API
Now that we have a click handler hooked up to the Copy button, and are able to get a reference to the text content to be copied, we can put this all together with the clipboard API. Specifically the writeText function is used to copy the given text to the system clipboard. It returns a promise that resolves after the clipboard has been updated with the text.
Update the copy() function in the controller as follows:
import { Controller } from "@hotwired/stimulus";

export default class extends Controller {
  static targets = ["content"]

  copy() {
    const text = this.contentTarget.innerText

    // === USE THE CLIPBOARD API TO COPY `text`
    navigator.clipboard.writeText(text)
      .then(() => {
        console.log('Text copied to clipboard');
      })
      .catch((error) => {
        console.error('Failed to copy text to clipboard:', error);
      });
  }
}To test if this is working, refresh the browser at http://localhost:3000 and click the Copy button. The dev tools Console tab should show:
Text copied to clipboardThen, entering Cmd + V in a new text document, or with your cursor anywhere in an existing document, should paste in the content from the page, starting with The sun gently peeked through the dense....
User Feedback
Technically, the copy to clipboard feature is working, but there's no visible feedback to the user that the copy was successful. It would be nice to update the text of the Copy button to "Copied" for a few seconds, so the user knows it worked, and then change the text back to "Copy".
In JavaScript, if you have a reference to a button element, it's text can be modified by setting it's textContent property. So if we had a reference to the button element, we could change its text in the copy() function, after the clipboard writeText promise is resolved.
To get a reference to a DOM element, we need an additional target. Let's include one for the button element, naming it button. The button element already has a data- attribute for the copy action we implemented earlier, and it's perfectly fine to have multiple data- attributes on the same element:
<%# app/views/welcome/index.html.erb %>

<div data-controller="clipboard">
  ...

  <%# === GET A REFERENCE TO THE BUTTON ELEMENT BY NAMING IT `button` === %>
  <button
    data-action="clipboard#copy"
    data-clipboard-target="button">
      Copy
  </button>
</div>
Then update the static targets list in the clipboard controller to add button:
import { Controller } from "@hotwired/stimulus"

export default class extends Controller {
  // === ADD BUTTON AS TARGET HERE ===
  static targets = ["content", "button"]

  copy() {
    // ...
  }
}
Once the button is added as a target, it can be referenced in controller functions as this.buttonTarget. Let's update the copy() function to update the button's text, then use a setTimeout to put the text back to what it was, after a 2 second delay:
import { Controller } from "@hotwired/stimulus"

export default class extends Controller {
  static targets = ["content", "button"]

  copy() {
    const text = this.contentTarget.innerText
    navigator.clipboard.writeText(text)
      .then(() => {
        // === UPDATE BUTTON TEXT TO COPIED ===
        this.buttonTarget.textContent = 'Copied';

        // === RESET THE BUTTON TEXT AFTER 2 SECONDS ===
        setTimeout(() => {
          this.buttonTarget.textContent = 'Copy';
        }, 2000);
      })
      .catch((error) => {
        console.error('Failed to copy text to clipboard:', error);
      });
  }
}
Values
At this point, the feature is functional and could be considered complete. But there's a few customizations that could make this more re-usable across your application. For example, there may be some places where the success text should show something else such as "Done". You may also want variability in the delay, for example 3 seconds or just 1 second rather than 2 seconds.
Currently these values are hard-coded in the controller. It would be nice if the app developer could provide these as inputs to the controller. In Stimulus, this is accomplished with values.
Start by declaring what inputs the Stimulus controller should accept with the static values declaration. This accepts an object where the keys are the input variable names, and the values are objects specifying the data types that the input will be converted to as it's read from the DOM into a JavaScript variable. You can also specify a default value in case none is provided from the DOM.
In the version of the controller below, two input values have been added to customize the behaviour:
confirm, which is a String to indicate what confirmation text the button should show after successful copy.delayMs, which is a number in milliseconds before the original button text is displayed again
import { Controller } from "@hotwired/stimulus"

// Connects to data-controller="clipboard"
export default class extends Controller {
  // ...

  // === DECLARE INPUT VARIABLES HERE ===
  static values = {
    confirm: { type: String, default: 'Copied' },
    delayMs: { type: Number, default: 2000 }
  }

  copy() {
    // ...
  }
}
Then the view is updated to pass these values in to the controller. Suppose the button text should be updated to Done rather than Copied, and we'd like a 3000 millisecond delay instead of the default 2000:
<%# app/views/welcome/index.html.erb %>

<%# === SPECIFY ADDITIONAL INPUT VALUES ON THE DOM ELEMENT === %>
<%# === WHERE THE STIMULUS CONTROLLER IS DECLARED === %>
<div data-controller="clipboard"
  data-clipboard-confirm-value="Done"
  data-clipboard-delay-ms-value="3000">
    ...
</div>
Then the Stimulus controller can be updated to use these values instead of the hard-coded Copied and 2000:
import { Controller } from "@hotwired/stimulus"

// Connects to data-controller="clipboard"
export default class extends Controller {
  static targets = ["content", "button"]

  static values = {
    confirm: { type: String, default: 'Copied' },
    delayMs: { type: Number, default: 2000 }
  }

  copy() {
    const text = this.contentTarget.innerText
    navigator.clipboard.writeText(text)
      .then(() => {
        // === USE `confirmValue`
        this.buttonTarget.textContent = this.confirmValue;
        setTimeout(() => {
          this.buttonTarget.textContent = "Copy";
        // USE `delayMsValue`
        }, this.delayMsValue);
      })
      .catch((error) => {
        console.error('Failed to copy text to clipboard:', error);
      });
  }
}
Naming Convention: camelCase is used in JavaScript, whereas kebab-case is used in the DOM. So data-clipboard-delay-ms-value on a DOM element becomes this.delayMs in the controller.
Targets vs Values
Both targets and values end up as this.something in the controller, which can be a little confusing. The distinction is:
Targets are DOM elements that the controller can reference. Use this when you need to perform DOM manipulation. These are specified by adding data-{controllerName}-target="foo" on any DOM element that the controller needs access to.
Values are inputs that can be provided to the controller from the DOM to vary its behaviour. Think of these as arguments provided to a function. These are specified by adding data-{controllerName}-{variableName}="{variableValue}" on the element where the controller is declared.
Here is the final version of the controller with comments explaining the mapping from targets and values to the DOM:
import { Controller } from "@hotwired/stimulus"

// Connects to data-controller="clipboard"
export default class extends Controller {
  // Targets are DOM elements this controller can reference
  //---------------------------------------------------
  // DOM                                JavaScript
  //---------------------------------------------------
  // data-clipboard-target="content"    this.contentTarget
  // data-clipboard-target="button"     this.buttonTarget
  static targets = ["content", "button"]

  // Values are inputs provided from the DOM into the controller
  // DOM                                    JavaScript
  //---------------------------------------------------
  // data-clipboard-confirm-value="foo"     this.confirmValue
  // data-clipboard-delay-ms-value="num ms" this.delayMsValue
  static values = {
    confirm: { type: String, default: 'Copied' },
    delayMs: { type: Number, default: 2000 }
  }

  copy() {
    const text = this.contentTarget.innerText
    navigator.clipboard.writeText(text)
      .then(() => {
        this.buttonTarget.textContent = this.confirmValue;
        setTimeout(() => {
          this.buttonTarget.textContent = "Copy";
        }, this.delayMsValue);
      })
      .catch((error) => {
        console.error('Failed to copy text to clipboard:', error);
      });
  }
}
Internationalization
After publishing the original version of this post, a Reddit user raised a great question: How would you make this work with internationalization? That question brought up an issue I hadn’t considered - there are many hard-coded English words throughout the solution, including in the Stimulus controller:
this.buttonTarget.textContent = "Copy";While internationalization (i18n) in Rails is a broad topic, here's how this specific problem can be solved:
Step 1: Configure i18n
Add the locales that are supported and specify a default. This can go either in config/application.rb as shown below or in config/initializers/locale.rb:
module StimulusDemo
  class Application < Rails::Application
    # Support English and Spanish
    config.i18n.available_locales = %i[en es]

    # Default to English
    config.i18n.default_locale = :en

    # ...
  end
end
Step 2: Controller Locale Switching
In the main application controller, add a before_action to set the locale from params or the default if not specified:
class ApplicationController < ActionController::Base
  before_action :set_locale

  private

  def set_locale
    I18n.locale = params[:locale] || I18n.default_locale
  end

  # ensures locale is included in all generated URLs
  def default_url_options
    { locale: I18n.locale }
  end
end
Step 3: Modify Routes to Include Locale
Wrap routes that need to work with translations with an optional path scope. This allows routes that don't specify a locale to be considered valid and use the default locale:
# config/routes.rb
Rails.application.routes.draw do
  scope "(:locale)", locale: /en|es/ do
    root "welcome#index"
    get "welcome/index"
  end
  # ...
end
Step 4: Create Translation Files
Take all the currently hard-coded English content out of controllers, and views and move it to the translation files:
# config/locales/en.yml
en:
  clipboard:
    copy: "Copy"
    done: "Done"
  welcome:
    index:
      very_important_content: >
        The sun gently peeked through the dense foliage, casting dappled shadows on the forest floor.
        With a steady hand, the artist meticulously applied strokes of vibrant color to the canvas, bringing the landscape to life.
        ...
# config/locales/es.yml
es:
clipboard:
copy: "Copiar"
done: "Hecho"
welcome:
index:
very_important_content: >
El sol se asomó suavemente a través del denso follaje, proyectando sombras moteadas en el suelo del bosque.
...Step 5: Add Language Switcher
Update the application layout with links to switch to English or Spanish:
<%# app/views/layouts/application.html.erb %>
<!DOCTYPE html>
<html lang="<%= I18n.locale %>">
  <head>...</head>

  <body>
    <%# === NEW: ADD LINKS FOR LANGUAGE SWITCHING === %>
    <header>
      <div >
        <%= link_to "English", url_for(locale: :en) %>
        <%= link_to "Español", url_for(locale: :es) %>
      </div>
    </header>

    <main>
      <%= yield %>
    <main>
  </body>
</html>
Step 6: Update Welcome Controller
Set translated content rather than hard-coded:
# app/controllers/welcome_controller.rb
class WelcomeController < ApplicationController
  def index
    # @very_important_content = "The sun gently peeked through..."
    @very_important_content = I18n.t("welcome.index.very_important_content")
  end
end
Step 7: Update Stimulus Controller
Replace the hard-coded English word "Copy" with a new input value copyText:
// app/javascript/controllers/clipboard_controller.js
export default class extends Controller {
  // === NEW: copyText ADDED HERE ===
  // === OPTIONALLY REMOVE DEFAULTS SO THESE MUST ALWAYS BE PROVIDED ===
  static values = {
    confirm: { type: String, default: 'Done' },
    delayMs: { type: Number, default: 2000 },
    copyText: { type: String, default: 'Copy' }
  }

  copy() {
    const text = this.contentTarget.innerText
    navigator.clipboard.writeText(text)
      .then(() => {
        this.buttonTarget.textContent = this.confirmValue;
        setTimeout(() => {
          // === NEW: USE copyTextValue INSTEAD OF HARD-CODED ENGLISH WORD ===
          // this.buttonTarget.textContent = "Copy";
          this.buttonTarget.textContent = this.copyTextValue;
        }, this.delayMsValue);
      })
      // ...
  }
}
Step 8: Update Welcome View
Finally, update the welcome index view to pass in the translation values rather than hard-coded English words into the Stimulus controller via the data attributes:
<%# app/views/welcome/index.html.erb %>
<div
  data-controller="clipboard"
  data-clipboard-confirm-value="<%= t('clipboard.done') %>"
  data-clipboard-delay-ms-value="3000"
  data-clipboard-copy-text-value="<%= t('clipboard.copy') %>">

  <div data-clipboard-target="content" id="content">
    <%= @very_important_content %>
  </div>

  <button
    data-action="clipboard#copy"
    data-clipboard-target="button">
      <%= t('clipboard.copy') %>
  </button>
</div>
Now it defaults to English (added some TailwindCSS styles):
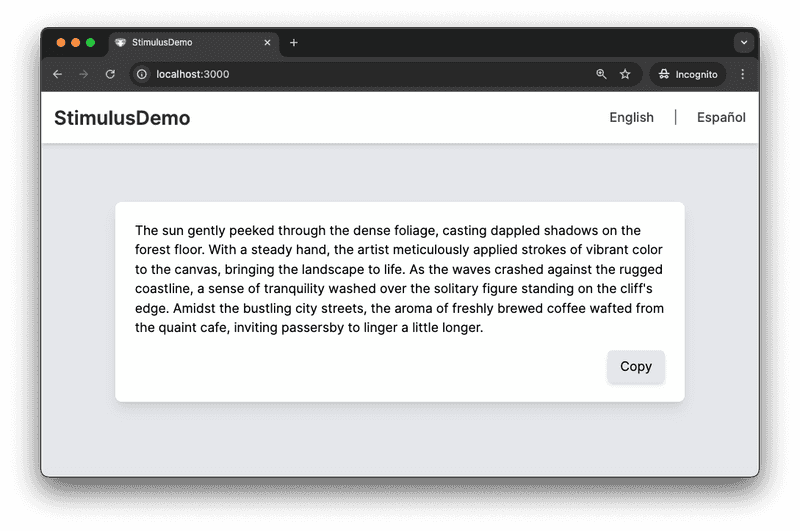
Clicking Spanish changes the url and content:
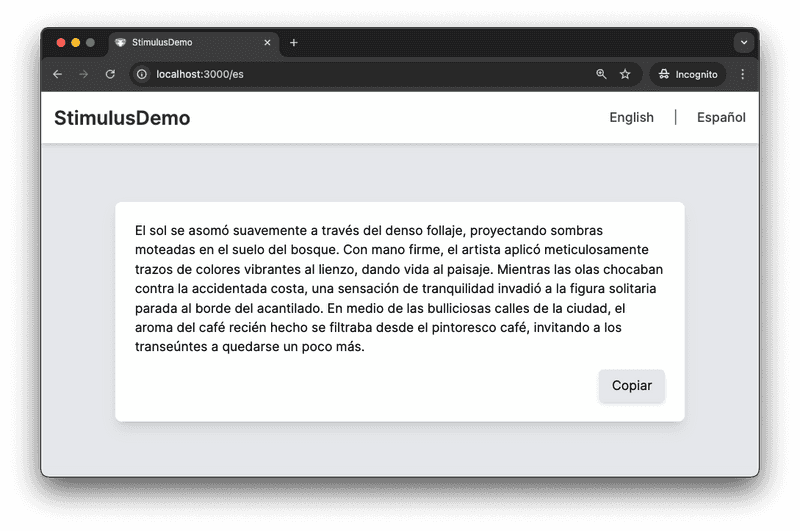
Clicking the Copy button while on the /es url, shows that it's functioning in Spanish (and after a few seconds returns to "Copiar"):
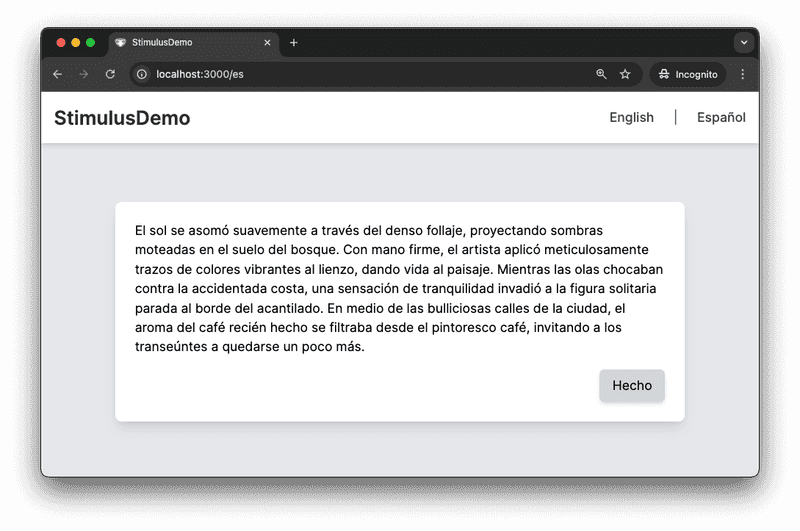
The complete changeset to add multi-language support can be viewed here.
Debugging
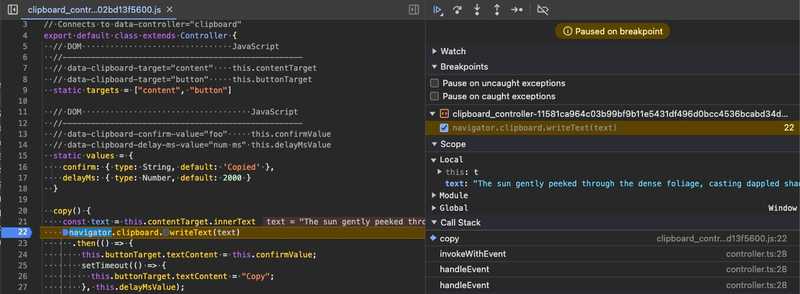
Stimulus controllers can be debugged using the browser developer tools just like any other JavaScript. For example using Chrome, from the developer tools, click on the "Sources" tab:

Enter Command + P to bring up the sources fuzzy search (or if using Windows, follow the instructions displayed in the Sources tab for the shortcut), then start typing in "clipboard". It should find a match like this:

After hitting Enter to action the file match, it will load the file in the Sources tab. Then you can add breakpoints as usual. For example, here I've added a breakpoint at the navigator.clipboard line and clicked on the Copy button:
Loading
We didn't have to do anything special like registering or loading the controller. It just "showed up" in the app. This is because this project is using import-maps, which is the default for JavaScript when starting a new Rails 7 project. The Rails integration automatically loads all the Stimulus controller files from app/javascript/controllers. If you're using a different JS bundler such as Webpack or esbuild, it will require a few more steps. See the Stimulus docs on installing for more details.
Maintainability
A few caveats about maintainability:
On a large app with many Stimulus controllers, the template files will end up full of data-controller, data-somecontroller-target and data-somecontroller-somevariable-value. This could get confusing especially if there are multiple controllers in the same area of the DOM.
It would be amazing to have IDE support such as hover/go-to definition from the template to the controller and vice versa. There is Stimulus LSP for VSCode, which provides some support. It has completion support in the template, validation, and using the go-to-definition shortcut on any data- attribute from the template goes to the controller, although always the top of the file, not the specific value or target line. Doesn't work the other way though, from controller to template(s). Free extension idea if anyone's looking for a side project 😀
Another aspect of maintainability is automated testing. At the time of this writing, I couldn't find anything in the Stimulus Reference about unit testing controllers, although there is some discussion here and here.
In the meantime, be sure to have system tests that cover any JavaScript interactivity from the Stimulus controllers. If using Capybara, this means configuring it with a driver capable of executing JavaScript and understanding its waiting behaviour.
Conclusion
This post covered how to implement a Copy to Clipboard feature in a Rails application using Stimulus. It began with an overview of Stimulus and its role in adding interactivity to web apps. Then it explained how to create a new Stimulus controller, use Stimulus actions to handle DOM events, targets to perform DOM manipulation, and values for customization of the controller's behaviour. Finally it covered some aspects of maintainability to be aware of when using Stimulus.
Here's some further reading on Stimulus from the official documentation site:
- Intro
- Installation - contains important information about naming conventions!
- Lifecycle Callbacks
- Actions
- Targets
- Values


