Build a Rails App with Slack Part 1: OAuth

Welcome to the first installment of this multi-part series on building a Slack application with Rails. This series will guide you through the process of creating a Slack application with Rails and is structured as follows:
- Part 1: Rails new, Slack, and OAuth === YOU ARE HERE ===
- Part 2: Slack Slash Command with Text Response
- Part 3: Slack Slash Command with Modal Response
- Part 4: Slack Action Modal Submission
- Part 5: Slack Slash Command with Block Kit Response
Feel free to jump to a specific part of interest using the links above or follow along sequentially. You can also checkout the source code on Github for the application we'll be building.
This post assumes the reader has at least a beginner level familiarity with Ruby on Rails. It's also assumed the reader has used Slack as an end user with basic interactions such as joining channels, sending messages, and participating in conversations.
Introducing Retro Pulse
Before getting into the technical details, let's take a look at the app we'll be building: Retro Pulse. This app aims to improve the agile retrospective process. Normally a retrospective meeting is booked at the end of a sprint and everyone who contributed to the project is asked to provide their feedback such as what the team should keep on doing, what they should stop doing, and something new to try for the next sprint. But sometimes the sprints can get so hectic, its hard to remember at the end everything that happened and valuable feedback can be lost.
Wouldn't it be nice if a retrospective board could be opened at the beginning of a sprint with a Slack slash command like this:
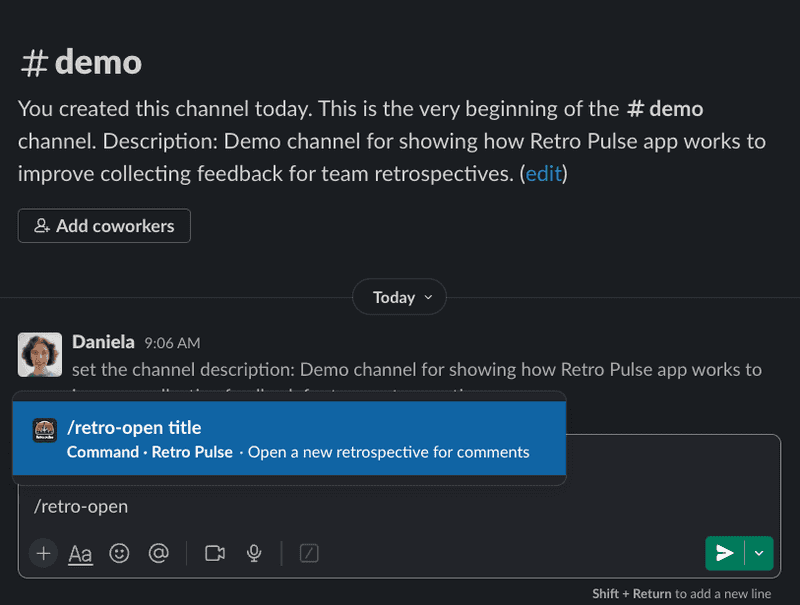
Given a project named "Quantum Canvas" and the team is just starting on Sprint 3:
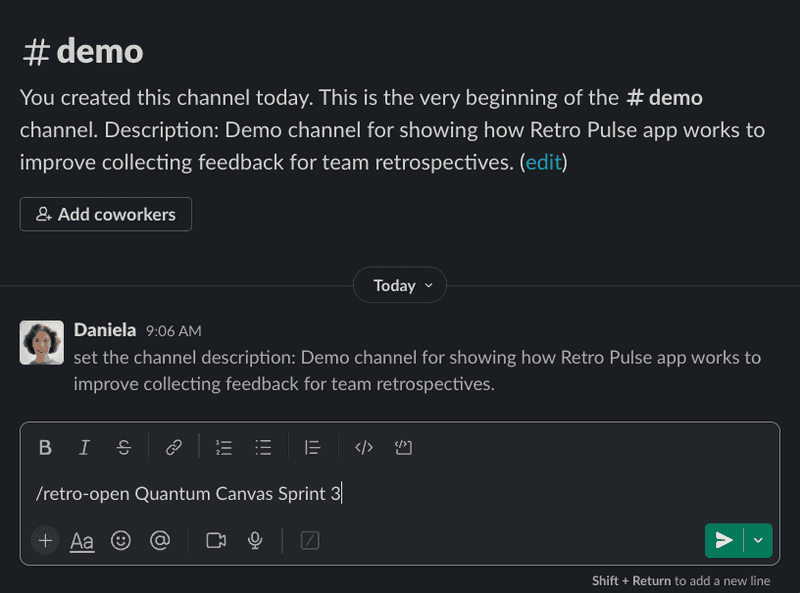
After hitting Enter, the app responds with a confirmation that the retrospective has been opened:

Then whenever a thought occurs to anyone on the team during the sprint about how things are going, they can request to submit their feedback quickly via Slack using another slash command:
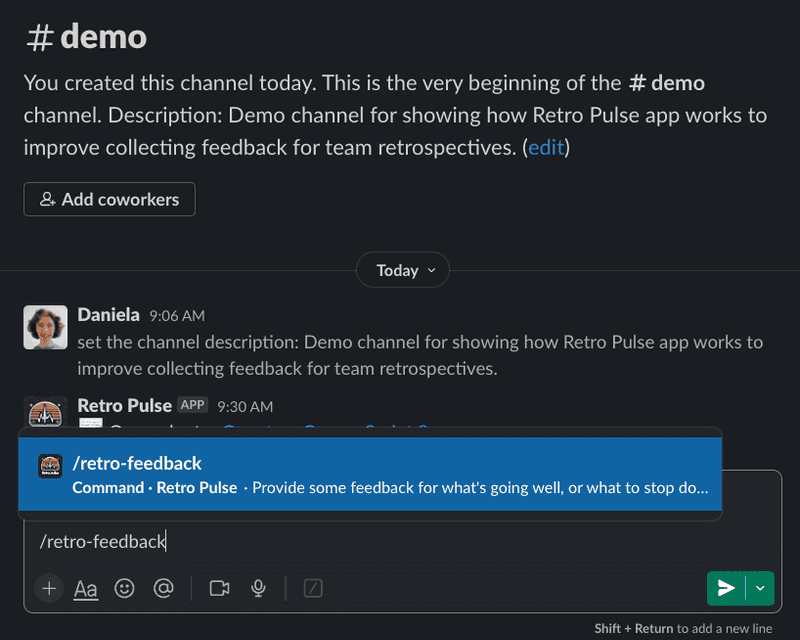
The app responds with a form where the team member can select the feedback category:
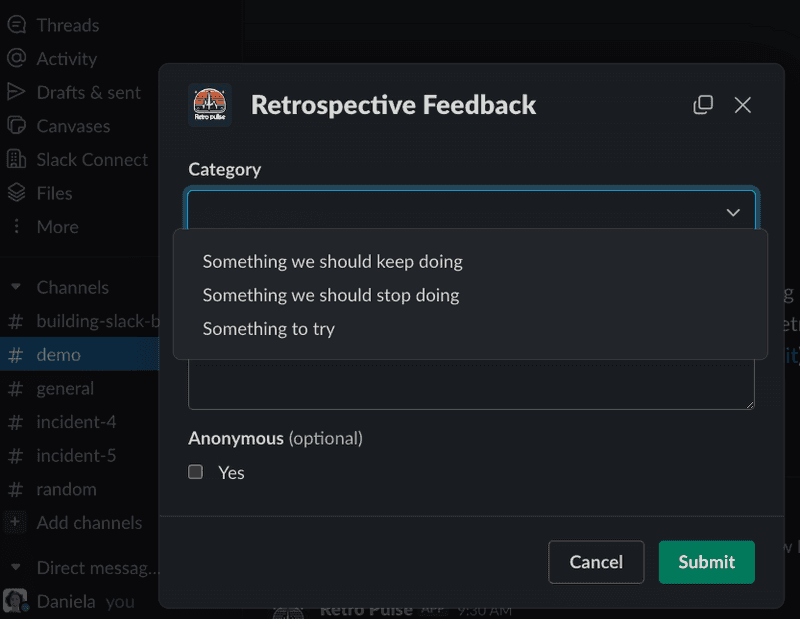
The team member can then fill in their feedback:
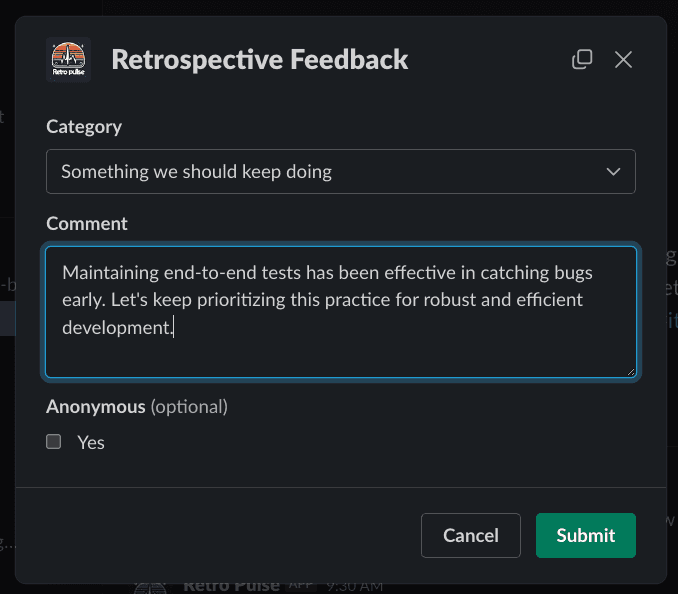
After submitting the form, the app responds with a direct message (DM) to the user confirming their feedback has been received:

When its time to have the retrospective meeting, a lot of feedback has already been captured. Another slash command can be used to start the discussion:
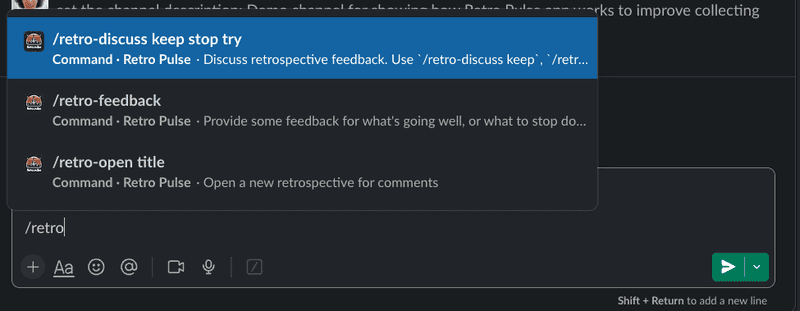
Any category of feedback can be selected, usually we start with the "keep" category:

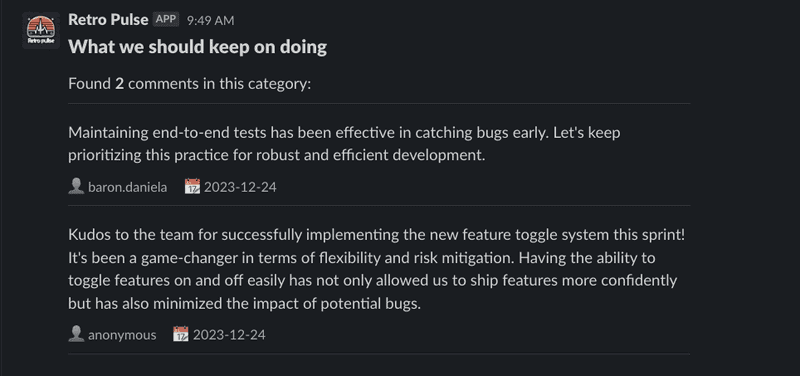
The app responds with all the comments that have been collected in that category. Note that if the user selected the "Anonymous" checkbox when filling out the feedback form, then the label anonymous will be displayed under the feedback. Otherwise, their Slack username will be displayed:
Finally, when the retrospective meeting is over, it can be closed with another slash command:
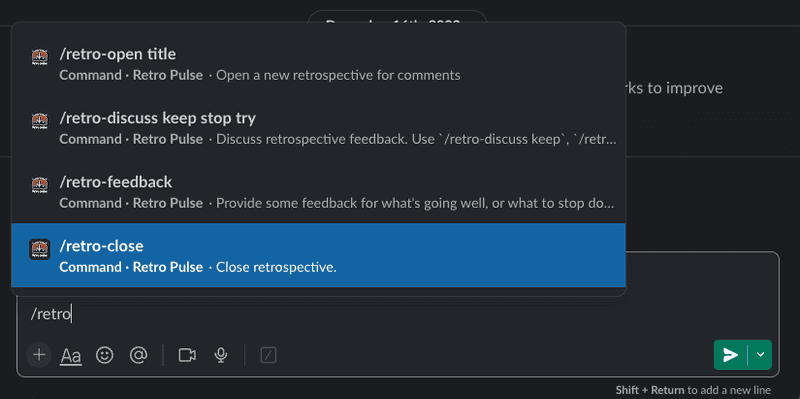
Which the app responds to with a confirmation message that the retrospective has been closed:

Create Rails App
Ok, now let's build Retro Pulse! Start by generating a new Rails project. I'm using PostgreSQL because later we'll be using enum types on some of the models. I'm also using TailwindCSS for some very light styling of the application landing page, but you can stick with vanilla CSS if you prefer, or skip the styling altogether as it's not critical to the Slack flow.
Any Ruby 3.x and Rails 7.x should be fine:
ruby --version
# ruby 3.2.2

rails --version
# Rails 7.0.8

rails new retro-pulse --database=postgresql --css tailwind
In order to make the Slack integration as easy as possible, we'll be working with the following gems:
- slack-ruby-client: Send messages to Slack via the Web API.
- slack-ruby-bot-server: Exposes RESTful routes for managing Slack teams with OAuth integration. Uses
slack-ruby-clientunder the hood. - slack-ruby-bot-server-events: Extends functionality of
slack-ruby-bot-serverwith a mini-framework for handling Slack slash commands, actions, and events.
The dependency between these Slack gems looks like this:
└── slack-ruby-bot-server-events
    └── slack-ruby-bot-server
        └── slack-ruby-client
We only need to include slack-ruby-bot-server-events in our Gemfile, which will bring in the others. But this gem has a few other dependencies so add the following to the main section of the project Gemfile:
# Slack Integration
gem "slack-ruby-bot-server-events"
gem "otr-activerecord"
gem "pagy_cursor"Since integrating with Slack requires managing Slack-specific secrets, also add the dotenv-rails gem to the development and test groups. This supports secrets management with environment variables rather than hard-coding them into the application.
group :development, :test do
  gem 'dotenv-rails'
end
Then run bundle install.
Configure Rails for Slack
This next section explains the configuration changes needed to the Rails app to support integration with the Slack gems.
Add a .env file to the root of the project with touch .env, we'll be filling in the values shortly:
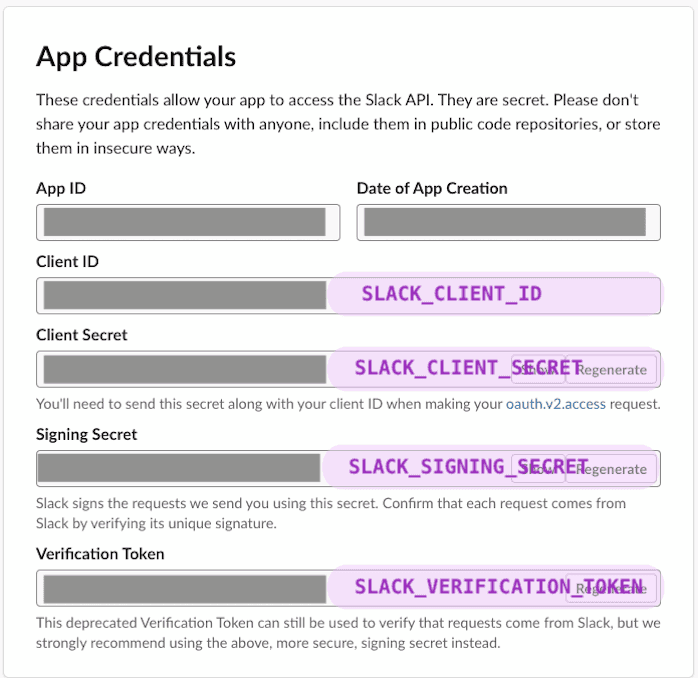
SLACK_CLIENT_ID=TBD
SLACK_CLIENT_SECRET=TBD
SLACK_SIGNING_SECRET=TBD
SLACK_VERIFICATION_TOKEN=TBD
Update the .gitignore file in the project root to ignore .env.
Update the config.ru file in the project root to also start the server provided by the slack-ruby-bot-server gem. This will expose RESTful endpoints to handle Slack teams. The config.ru file got generated earlier when you ran rails new.... Here is the original version:
# This file is used by Rack-based servers to start the application.
require_relative "config/environment"

run Rails.application
Rails.application.load_server
Add the new line shown below. This will cause the slack-ruby-bot-server to check for a working database connection and perform a migration to generate the teams table (will be used to persist the OAuth token). You didn't have to write this migration, it's part of the slack-ruby-bot-server gem:
# This file is used by Rack-based servers to start the application.
require_relative "config/environment"

# === ADD THIS LINE HERE ===
SlackRubyBotServer::App.instance.prepare!

run Rails.application
Rails.application.load_serverConfigure slack-ruby-bot-server by defining the OAuth scopes the Slack app will require. Scopes give the app permission to perform actions, such as posting messages in a workspace. Here are the specific scopes Retro Pulse requires:
# config/initializers/slack_ruby_bot_server.rb
SlackRubyBotServer.configure do |config|
  config.oauth_version = :v2
  config.oauth_scope = ["commands", "chat:write", "users:read", "chat:write.public"]
end
A brief explanation of why each of these scopes is required:
commands: Necessary for enabling slash commands in Slack. It allows the app to receive and respond to slash commands invoked by users in channels or direct messages.
chat:write: Grants the app the ability to send messages to channels where the app is installed and to DM (direct message) users. The app will use this to DM a user who has submitted feedback to confirm their feedback was received.
users:read: Provides access to user profile information. The app will use this to persist the Slack user information of the user that submitted the retrospective feedback (unless they choose to remain anonymous).
chat:write.public Grants the app the ability to send messages to channels it isn't a member of. The app will use this to post messages confirming a retrospective has been opened and to display all the feedback.
Configure slack-ruby-bot-server-events with the Slack signing secret (it's still a TBD in .env, but will be populated shortly):
# config/initializers/slack_ruby_bot_server_events.rb
SlackRubyBotServer::Events.configure do |config|
  config.signing_secret ||= ENV.fetch("SLACK_SIGNING_SECRET")
  config.signature_expires_in ||= 300
end
Add the endpoints provided by the slack-ruby-bot-server gem at /api in config/routes.rb:
Rails.application.routes.draw do
  mount Api => "/"
end
The slack-ruby-bot-server gem exposes routes using Grape. Since the details are not specified in config/routes.rb, if you run bin/rails routes in a terminal right now, you'll only see:
Prefix Verb   URI Pattern   Controller#Action
api           /             Api
However, you can run a Rails console bin/rails c, and run the code below to list the API routes exposed by the slack-ruby-bot-server gem:
Api.routes.each do |route|
  method = route.request_method.ljust(10)
  path = route.path
  puts "#{method} #{path}"
  nil
end
nil

# GET        /api(.:format)
# GET        /api/status(.:format)
# GET        /api/teams/:id(.:format)
# GET        /api/teams(.:format)
# POST       /api/teams(.:format)
# GET        /api/swagger_doc(.:format)
# GET        /api/swagger_doc/:name(.:format)
# POST       /api/slack/command(.:format)
# POST       /api/slack/action(.:format)
# POST       /api/slack/event(.:format)
The particular one we're interested in is POST /api/teams, this will be a critical part of the OAuth flow explained later in this post.
At this point, you should be able to start a Rails server with bin/dev. Also if you launch a Rails console with bin/rails c, you should be able to see the Team model, which is defined in the slack-ruby-bot-server gem. There are no teams populated at the moment, because we haven't yet written the code to add this app to a Slack workspace. Again, we didn't have to write any model code for Team as its already provided by slack-ruby-bot-server:
Team.all
# empty collection
You can also view the teams table schema by connecting directly to a database console with bin/rails db, and then use the \d meta-command:
-- This is for Postgres
\d teams
--                                                   Table "public.teams"
--            Column            |              Type              | Nullable |              Default
-- -----------------------------+--------------------------------+----------+-----------------------------------
--  id                          | bigint                         | not null | nextval('teams_id_seq'::regclass)
--  team_id                     | character varying              |          |
--  name                        | character varying              |          |
--  domain                      | character varying              |          |
--  token                       | character varying              |          |
--  oauth_scope                 | character varying              |          |
--  oauth_version               | character varying              | not null | 'v1'::character varying
--  bot_user_id                 | character varying              |          |
--  activated_user_id           | character varying              |          |
--  activated_user_access_token | character varying              |          |
--  active                      | boolean                        |          | true
--  created_at                  | timestamp(6) without time zone | not null |
--  updated_at                  | timestamp(6) without time zone | not null |
-- Indexes:
--     "teams_pkey" PRIMARY KEY, btree (id)
The teams table got generated by the slack-ruby-bot-server gem when we added SlackRubyBotServer::App.instance.prepare! to config.ru and started the Rails server for the first time. Once we have OAuth working to add this app to a Slack workspace, you'll see how this table gets populated.
Ngrok
The Rails application is running on http://localhost:3000. However, Slack needs a publicly accessible URL to send requests to when events like OAuth redirects or slash commands are triggered. When you configure a callback URL or specify an endpoint for Slack to communicate with, it needs to be an address that Slack's servers can reach over the internet. Since localhost is specific to each user's local machine and not accessible externally, Slack wouldn't be able to send requests to your local development server.
This is where ngrok comes in. Ngrok creates a secure tunnel to your local development environment and provides a public URL that forwards requests to your localhost. It acts as an intermediary, allowing external services like Slack to communicate with your local development server. By using ngrok, you can expose your local server to the internet and provide a public URL that can be used as a callback or endpoint for Slack to send requests to during development.
Sign up for a free account and follow the instructions to install the ngrok command line utility. Then in a terminal, start ngrok forwarding to port 3000 (which is where the Rails server is running):
ngrok http 3000

# Output will look something like this, your details will vary:
# Region                        United States (us)
# Latency                       35ms
# Web Interface                 http://127.0.0.1:4040
# Forwarding                    https://12e4-203-0-113-42.ngrok-free.app -> http://localhost:3000
Make a note of the forwarding address that ngrok generated, for example: https://12e4-203-0-113-42.ngrok-free.app. This is the address we'll be providing to Slack in the next section to tell it where to send OAuth codes to.
Create Slack App
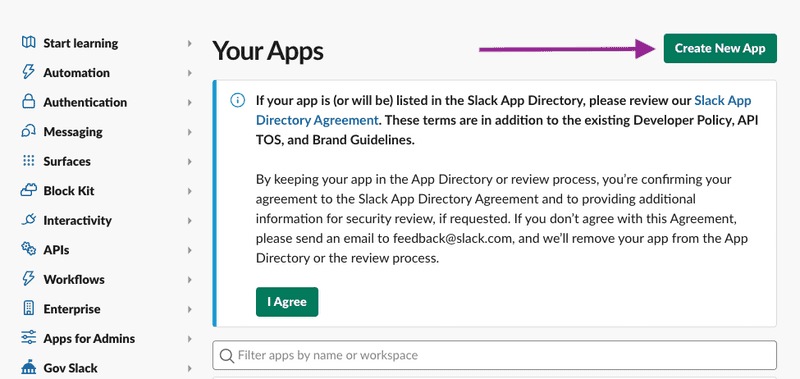
The next part is to create a new Slack application. Open https://api.slack.com/apps (sign in to your Slack account if prompted), and click on "Create New App". At the time of this writing, this is a green button at the top right of the "Your Apps" page like this:
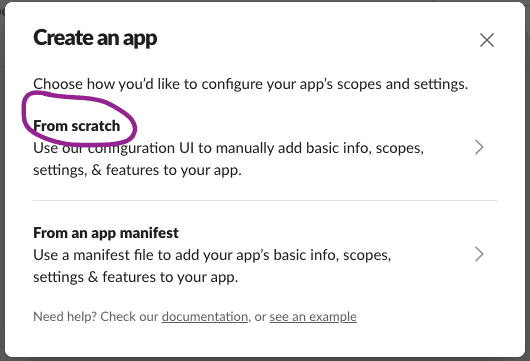
Choose "From scratch":
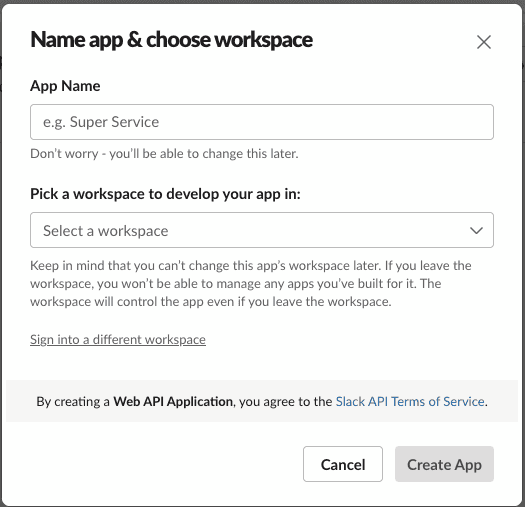
For the App Name, enter "Retro Pulse" (feel free to choose another name). Then select a workspace. If you're logged in to your employer's workspace that will show up in the list, but you can also create your own workspace for app development, then select it from the list:
After clicking "Create App", you'll be navigated to the "Basic Information" settings of your newly created app. Copy the values Client ID, Client Secret, Signing Secret, and Verification Token from the App Credentials section, to the corresponding entries in the .env file you created earlier in the Rails app project root:
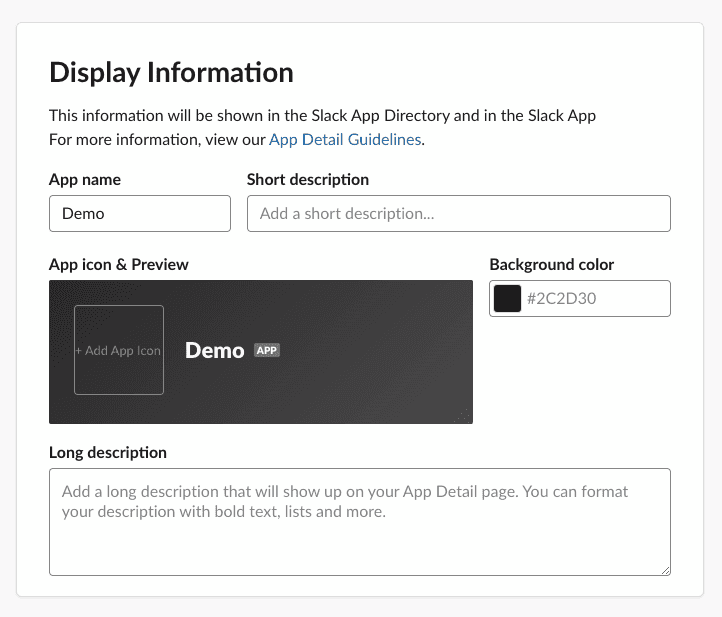
Still in the Basic Information section, scroll down to the section titled "Display Information", it will look something like this:
 .
.
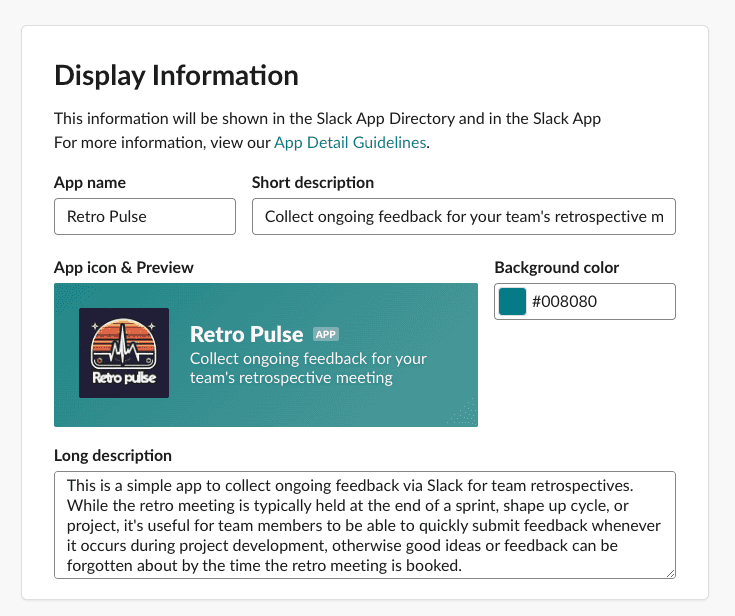
Fill in the details, here's what I used:
App name: Retro Pulse
Short description: Collect ongoing feedback for your team's retrospective meeting
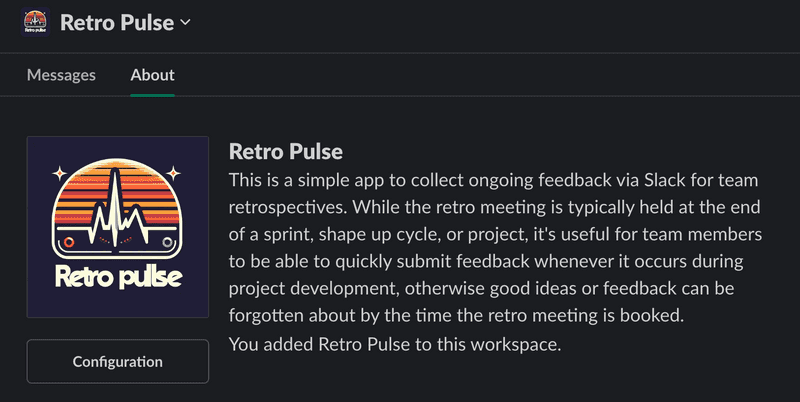
Long description: This is a simple app to collect ongoing feedback via Slack for team retrospectives. While the retro meeting is typically held at the end of a sprint, shape up cycle, or project, it's useful for team members to be able to quickly submit feedback whenever it occurs during project development, otherwise good ideas or feedback can be forgotten about by the time the retro meeting is booked.
Optionally, you can upload a logo and adjust the background color for how the app will appear in Slack. As I'm not a designer, I asked Microsoft's Copilot to draw a logo for me. Putting this all together, here's what my Display Information looks like:
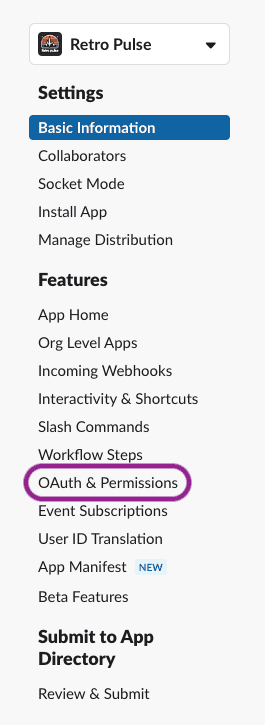
Next, click on the OAuth & Permissions section from the left hand section under Features:
Enter the following Redirect URL. The host name should be the forwarding address you saw when starting ngrok in the previous step. Your Client ID is from the Basic Information section.
https://12e4-203-0-113-42.ngrok-free.app?scope=incoming-webhook&client_id=your_client_idRecall that ngrok is forwarding to http://localhost:3000, so the above url will land on the root route of the Rails app. The next section will cover changes to the Rails app to handle it..
Rails Send OAuth Request
We need to create an "Add to Slack" link that will be displayed on the home page of the Rails app. When the user clicks on it, they will be taken to Slack where they will be asked if they agree to authenticate Retro Pulse (which will add the app to their chosen Slack Workspace).
Add a WelcomeController with an index method. The method is left empty as it uses Rails conventions to display the associated welcome index view:
# app/controllers/welcome_controller.rb
class WelcomeController < ApplicationController
  def index; end
end
Add the associated welcome index view. This view uses SlackRubyBotServer to generate a link to the Slack OAuth authorization url, with the scopes and client ID that were configured earlier. The image source is from platform.slack-edge.com.
<%# app/views/welcome/index.html.erb %>
<div>
  <a href="<%= SlackRubyBotServer::Config.oauth_authorize_url %>?scope=<%= SlackRubyBotServer::Config.oauth_scope_s %>&client_id=<%= ENV['SLACK_CLIENT_ID'] %>">
    <img alt="Add to Slack" height="40" width="139" src="https://platform.slack-edge.com/img/add_to_slack.png">
  </a>
</div>
Configure the Welcome index view as the default route:
# config/routes.rb
Rails.application.routes.draw do
  # This was added earlier for to expose
  # REST routes from `slack-ruby-bot-server` gem
  mount Api => "/"

  # === NEW: Add default route
  root "welcome#index"
end
To confirm the routes available in the app currently, run bin/rails routes. The output should look like this:
Prefix Verb   URI Pattern   Controller#Action
api           /             Api
root   GET    /             welcome#index
Run the Rails server with bin/dev and navigate to http://localhost:3000. You should see a clickable "Add to Slack" button like this:
Open the developer tools from your browser and inspect the generated url for the Slack button. It will include the OAuth scopes and Client ID that were configured earlier:
https://slack.com/oauth/v2/authorize?
  scope=commands,chat:write,users:read,chat:write.public
  &client_id=your_client_id
If you click the "Add to Slack" button, you'll be taken to a Slack page showing that the app is requesting permission to access your Slack workspace. I've annotated the screenshot with the OAuth scopes we configured earlier:
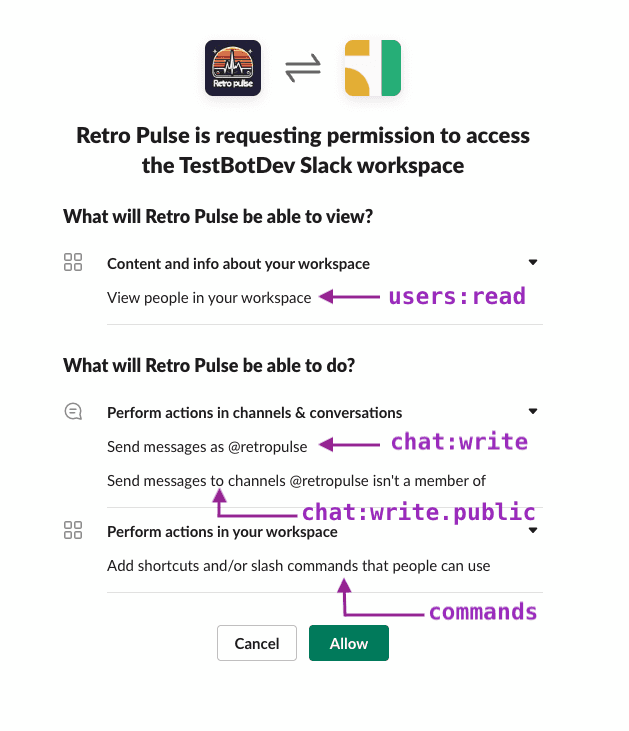
Don't click the "Allow" button yet. We still have some work to do on the Rails side to handle this.
Rails Receive OAuth Response
When the user clicks the "Allow" button from the Slack OAuth permission page, Slack will send a request to the Redirect URL that was defined earlier when we created the Slack app. Recall we defined the Redirect URL to be the homepage served at the root of the Rails application /, which is handled by the WelcomeController and view.
The Redirect URL will contain the OAuth code. This needs to be exchanged for a token, to do this, we'll write a small amount of JavaScript with a StimulusJS controller that takes the code, and submits a POST to the /api/teams endpoint provided by the slack-ruby-bot-server gem. That endpoint will do the work of exchanging the code provided in the redirect url by Slack, for a token, which will be persisted in the teams table. The gem will do most of the work, but as it only provides a POST endpoint, and Slack is sending us a GET, a small amount of JavaScript is required to glue this together.
Start by generating the Stimulus controller:
bin/rails generate stimulus SlackTeamRegistrationThis generates the following JavaScript file:
// app/javascript/controllers/slack_team_registration_controller.js
import { Controller } from "@hotwired/stimulus"

// Connects to data-controller="slack-team-registration"
export default class extends Controller {
  connect() {
  }
}
Update the Welcome index view to add a <div> element with its data-controller attribute set to slack-team-registration. By naming convention, anytime an element with this attribute appears in the DOM, the connect() function of the SlackTeamRegistration Stimulus controller will run.
<%# app/views/welcome/index.html.erb %>
<div>
  <a href="<%= SlackRubyBotServer::Config.oauth_authorize_url %>?scope=<%= SlackRubyBotServer::Config.oauth_scope_s %>&client_id=<%= ENV['SLACK_CLIENT_ID'] %>">
    <img alt="Add to Slack" height="40" width="139" src="https://platform.slack-edge.com/img/add_to_slack.png">
  </a>

  <%# === Add a div here to connect to the StimulusJS controller === %>
  <div data-controller="slack-team-registration">
  </div>
</div>
Now let's implement the connect() function in JavaScript. When Slack sends a GET to our Rails app, it will include a code parameter in the URL, which can be extracted with URLSearchParams. Once the code is extracted, fetch is used to send an HTTP POST to /api/teams:
import { Controller } from "@hotwired/stimulus"

// Connects to data-controller="slack-team-registration"
export default class extends Controller {
  connect() {
    const code = new URLSearchParams(window.location.search).get("code")

    if (code) {
      fetch("/api/teams", {
        method: "POST",
        headers: { "Content-Type": "application/json" },
        body: JSON.stringify({ code })
      })
      .then(response => response.json())
      .then(data => {
        console.log("Successfully registered new team!")
      })
      .catch(error => {
        console.log("An error occurred while registering the team.")
      });
    }
  }
}
To improve the user experience, the app should display a message while the POST to /api/teams is in progress, and whether it succeeded or not. To do this, add a <span> element to the welcome index view with a target of message, which will make it available to the Stimulus controller as this.messageTarget:
<%# app/views/welcome/index.html.erb %>
<div>
  <a href="<%= SlackRubyBotServer::Config.oauth_authorize_url %>?scope=<%= SlackRubyBotServer::Config.oauth_scope_s %>&client_id=<%= ENV['SLACK_CLIENT_ID'] %>">
    <img alt="Add to Slack" height="40" width="139" src="https://platform.slack-edge.com/img/add_to_slack.png">
  </a>

  <div data-controller="slack-team-registration">
    <%# === Add a target for the StimulusJS controller === %>
    <span data-slack-team-registration-target="message"></span>
  </div>
</div>
Then update the Stimulus controller to access this DOM element with static targets, and populate it using this.messageTarget.innerHTML:
import { Controller } from "@hotwired/stimulus"

// Connects to data-controller="slack-team-registration"
export default class extends Controller {
  // Connects to any DOM node, with target: message,
  // eg: <element data-slack-team-registration-target="message"></element>
  static targets = [ "message" ]

  connect() {
    const code = new URLSearchParams(window.location.search).get("code")

    if (code) {
      // Update <span data-slack-team-registration-target="message"></span>
      // with "Working, please wait..."
      this.messageTarget.innerHTML = "Working, please wait ...";

      fetch("/api/teams", {
        method: "POST",
        headers: { "Content-Type": "application/json" },
        body: JSON.stringify({ code, state })
      })
      .then(response => response.json())
      .then(data => {
        // Update <span data-slack-team-registration-target="message"></span>
        // with a success message
        this.messageTarget.innerHTML = `Team successfully registered!`;
        this.messageTarget.style.display = "block";
      })
      .catch(error => {
        // Update <span data-slack-team-registration-target="message"></span>
        // with an error message
        this.messageTarget.innerHTML = "An error occurred while registering the team.";
        this.messageTarget.style.display = "block";
      });
    }
  }
}Rails Blocked Host
The OAuth flow isn't going to work quite yet, there's one more thing required on the Rails side to allow incoming requests that aren't localhost. Recall that ngrok running at something like https://12e4-203-0-113-42.ngrok-free.app, which will forward requests to the Rails app running at http://localhost:3000.
As of Rails 6, the ActionDispatch::HostAuthorization middleware will block any requests that aren't localhost. This means when Slack sends the Redirect URL containing the OAuth code, it will never hit the Welcome controller because the HostAuthorization middleware will reject it.
To resolve this, add the ngrok forwarding address in config/environments/development.rb so that it will be allowed:
# config/environments/development.rb
Rails.application.configure do
  config.hosts = [
    IPAddr.new("0.0.0.0/0"),            # All IPv4 addresses.
    IPAddr.new("::/0"),                 # All IPv6 addresses.
    "localhost",                        # The localhost reserved domain.
    "12e4-203-0-113-42.ngrok-free.app"  # Allow incoming requests from Slack via ngrok.
  ]

  # other config...
end
BUT: Every time you restart ngrok, it will assign a different forwarding address (on the free plan). Also, if this project is going to be worked on by a team of developers, every developer running ngrok on their laptop will have a different forwarding address. So hard-coding a specific ngrok address in the config file as shown above will be awkward because it will require everyone to edit it and result in merge conflicts in version control.
This can be resolved by introducing an environment variable: SERVER_HOST_NAME. Add it to the .env file in the project root (recall this file is gitignored), for example:
SLACK_CLIENT_ID=your-app-client-id
SLACK_CLIENT_SECRET=your-app-client-secret
SLACK_SIGNING_SECRET=your-app-signing-secret
SLACK_VERIFICATION_TOKEN=your-app-verification-token

# Replace the value with your ngrok forwarding address:
SERVER_HOST_NAME=12e4-203-0-113-42.ngrok-free.app
Then update the dev config file in the Rails project to use the SERVER_HOST_NAME environment variable:
# config/environments/development.rb
Rails.application.configure do
  config.hosts = [
    IPAddr.new("0.0.0.0/0"),    # All IPv4 addresses.
    IPAddr.new("::/0"),         # All IPv6 addresses.
    "localhost",                # The localhost reserved domain.
    ENV["SERVER_HOST_NAME"]     # Allow incoming requests from Slack via ngrok.
  ]

  # other config...
end
Remember to restart the Rails server after making changes to config/environments/development.rb and .env files.
Run the OAuth Flow
Now, we're ready to put together all these parts and try out the OAuth flow. Restart the Rails server at bin/dev, navigate to http://localhost:3000, then click on the "Add to Slack" button:

You should be redirected to a url at Slack that contains your Client ID and the OAuth scopes that this app requires (which we configured earlier). The URL you get redirected to looks something like this:
https://your-workspace.slack.com/oauth
  ?client_id=your-client-id
  &scope=commands,chat:write,users:read,chat:write.public
  &user_scope=
  &redirect_uri=
  &state=
  &granular_bot_scope=1
  &single_channel=0
  &install_redirect=
  &tracked=1
  &team=1
This time click the "Allow" button:
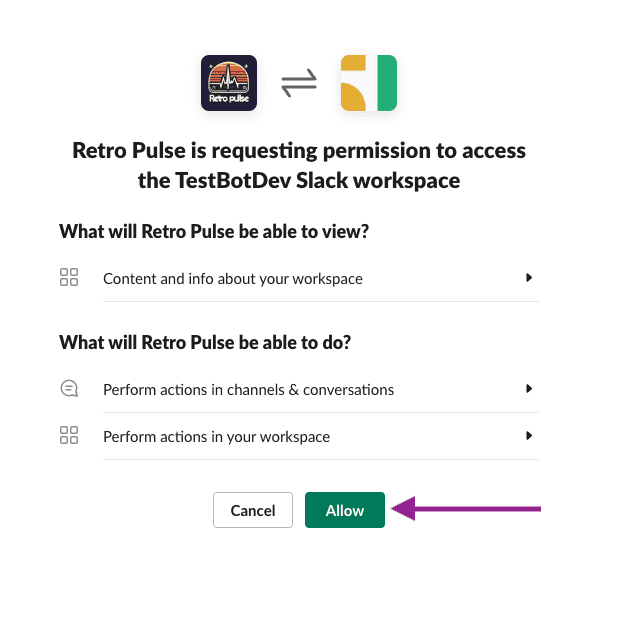
Clicking the "Allow" button will make Slack redirect back to the Rails app, at the ngrok forwarding address we setup in the Slack UI earlier when defining our app. The URL will look as shown below. The important piece of information here is the code parameter, which we will need to exchange for an OAuth token:
https://your-ngrok-address.ngrok-free.app/
  ?scope=incoming-webhook
  &client_id=your-client-id
  &code=temp-oauth-code
  &state=
The first time you're using the ngrok address, ngrok will display an intermediary page. Your values will be different but it looks something like this:
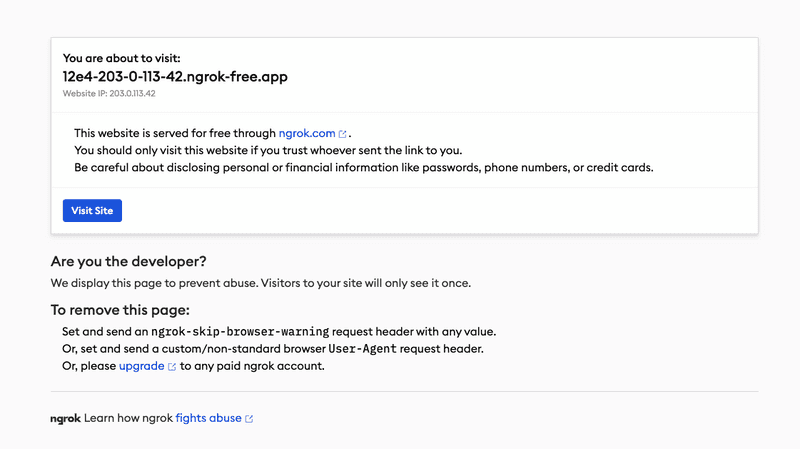
Go ahead and click the "Visit Site" button, then this request will reach the root of the Rails app running at http://localhost:3000 (because ngrok is forwarding traffic there).
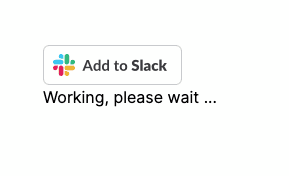
This will render the Rails app homepage which is handled by the WelcomeController. Recall we added a StimulusJS controller to detect if a code parameter is in the URL, which it is right now, so the Stimulus controller will submit a POST to the /api/teams endpoint. At this point you should see a "Working" message, this is the StimulusJS controller waiting for a result from the POST /api/teams endpoint:
The Rails server will show that it's processing the POST /api/teams request. Unfortunately it does not show the activity where it exchanges the code for a token with Slack, but this is what the teams endpoint provided by the slack-ruby-bot-server gem is doing behind the scenes. When it receives the token from Slack, it receives additional information including your Slack team name, workspace name, and the user id that activated the Slack App.
The teams endpoint then checks if a team with the given token or Slack team_id already exists, and if not, will create one in the database. This activity can be seen in the Rails server output. Here is a simplified view:
Started POST "/api/teams"
  Team Load (2.2ms)  SELECT "teams".* FROM "teams" WHERE "teams"."token" = $1 LIMIT $2
    [["token", "the-token-returned-by-slack"], ["LIMIT", 1]]
  Team Load (1.5ms)  SELECT "teams".* FROM "teams" WHERE "teams"."team_id" = $1 LIMIT $2
    [["team_id", "your-slack-team-id"], ["LIMIT", 1]]
  TRANSACTION (3.0ms)  BEGIN
  Team Create (4.3ms)  INSERT INTO "teams"
    ("team_id", "name", "domain", "token", "oauth_scope", "oauth_version", "bot_user_id", "activated_user_id", "activated_user_access_token", "active", "created_at", "updated_at")
    VALUES ($1, $2, $3, $4, $5, $6, $7, $8, $9, $10, $11, $12)
    RETURNING "id"
    [
      ["team_id", "your-slack-team-id"],
      ["name", "TestBotDev"],
      ["domain", nil],
      ["token", "the-token-returned-by-slack"],
      ["oauth_scope", "commands,chat:write,users:read,chat:write.public"],
      ["oauth_version", "v2"],
      ["bot_user_id", "your-slack-bot-user-id"],
      ["activated_user_id", "slack-user-that-allowed-this-app"],
      ["activated_user_access_token", "the-token-returned-by-slack"],
      ["active", true],
      ["created_at", "2023-12-15 13:02:52.784031"],
      ["updated_at", "2023-12-15 13:02:52.784031"]
    ]
  TRANSACTION (2.3ms)  COMMIT
When the POST /api/teams endpoint completes, it returns a response to the StimulusJS controller that called it. The success response will be 201 Created with response body containing the teams record that was just created:
{
  "id": 4,
  "team_id": "your-slack-team-id",
  "name": "your-slack-workspace",
  "active": true,
  "created_at": "2023-12-15T13:02:52.784Z",
  "updated_at": "2023-12-15T13:02:52.784Z"
}
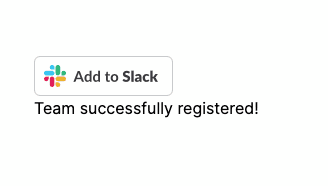
Finally, when the StimulusJS controller receives a success response, it updates the display to a success message:
You can also confirm the team was created in a Rails console bin/rails c:
team = Team.first
# Team Load (1.1ms)  SELECT "teams".* FROM "teams" ORDER BY "teams"."id" ASC LIMIT $1  [["LIMIT", 1]]
#<Team:0x000000010aad10a0
#  id: 4,
#  team_id: "your-slack-team-id",
#  name: "your-slack-workspace",
#  domain: nil,
#  token: "the-oauth-token-returned-by-slack",
#  oauth_scope: "commands,chat:write,users:read,chat:write.public",
#  oauth_version: "v2",
#  bot_user_id: "your-slack-bot-user-id",
#  activated_user_id: "slack-user-that-allowed-this-app",
#  activated_user_access_token: "the-oauth-token-returned-by-slack",
#  active: true,
#  created_at: Fri, 15 Dec 2023 13:02:52.784031000 UTC +00:00,
#  updated_at: Fri, 15 Dec 2023 13:02:52.784031000 UTC +00:00>
At this point, if you open your Slack desktop app, it should show that the Retro Pulse app has been added in the Apps section:
If you click on it and then select the "About" tab, Slack will display the information we entered earlier:
Style Landing Page
This part is optional, but makes for a nicer user experience. Up until this point, the welcome index view (i.e. the view that's rendered when navigating to the root / of the Rails application) displays only the Add to Slack button. This doesn't provide any information about what this app does. For this section, I've added some TailwindCSS styles for a very basic layout and appearance.
The application layout is updated to include the application name and logo:
<%# app/views/layouts/application.html.erb %>
<!DOCTYPE html>
<html>
  <head>
    <title>RetroPulse</title>
    <meta name="viewport" content="width=device-width, initial-scale=1">
    <%= csrf_meta_tags %>
    <%= csp_meta_tag %>
    <%= stylesheet_link_tag "tailwind", "inter-font", "data-turbo-track": "reload" %>

    <%= stylesheet_link_tag "application", "data-turbo-track": "reload" %>
    <%= javascript_importmap_tags %>
  </head>

  <body class="bg-gray-100">
    <header class="bg-blue-500 text-white py-4">
      <div class="container mx-auto flex justify-between items-center">
        <%= link_to root_path, class: "flex items-center" do %>
          <img src="<%= asset_path('logo.jpeg') %>" alt="Retro Pulse" class="h-16 w-auto mb-2">
          <h1 class="text-xl font-bold ml-2">Retro Pulse</h1>
        <% end %>
      </div>
    </header>

    <main class="container mx-auto mt-8 p-5 bg-white rounded shadow">
      <%= yield %>
    </main>
  </body>
</html>
And the welcome index view is updated to include a description of the application:
<%# app/views/welcome/index.html.erb %>
<div class="flex justify-center items-center">
  <div class="text-left max-w-md mx-auto">
    <div class="mb-8 text-gray-700">
      <p class="text-xl font-semibold leading-snug">About Retro Pulse</p>
      <p class="text-base leading-relaxed">
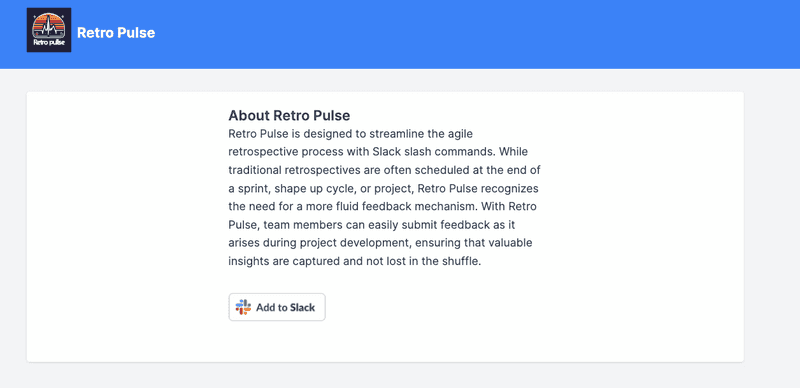
        Retro Pulse is designed to streamline the agile retrospective process with Slack slash commands. While traditional retrospectives are often scheduled at the end of a sprint, shape up cycle, or project, Retro Pulse recognizes the need for a more fluid feedback mechanism. With Retro Pulse, team members can easily submit feedback as it arises during project development, ensuring that valuable insights are captured and not lost in the shuffle.
      </p>
    </div>

    <a href="<%= SlackRubyBotServer::Config.oauth_authorize_url %>?scope=<%= SlackRubyBotServer::Config.oauth_scope_s %>&client_id=<%= ENV['SLACK_CLIENT_ID'] %>">
      <img alt="Add to Slack" height="40" width="139" src="https://platform.slack-edge.com/img/add_to_slack.png">
    </a>

    <div data-controller="slack-team-registration" class="mt-8">
      <span data-slack-team-registration-target="message"></span>
    </div>
  </div>
</div>
Resulting in a simple layout as follows:
Next Steps
We now have an authenticated Slack app added to our workspace, backed by a Rails application. The next step will be to make it do something useful. Specifically, we'd like to add a slash command so that a new retrospective can be opened from any Slack channel in the workspace. For example, suppose we're working on a project named "Quantum Canvas", and Sprint 3 has just started. We'd like to enter a message in a channel to tell the Retro Pulse app to open a retrospective named "Quantum Canvas Sprint 3":

See Part 2 of this series to learn how to setup your very first Slack Slash Command and handle it in Rails.


